I recently setup netboot.xyz on my home network and I thought this would be useful for others; especially ones that watch the HomeLab Show.
I stumbled upon netboot.xyz a few years ago as I was tired of juggling various flash drives with different OSs, keeping them up-to-date and the inevitable flash drive failure. At first, I loaded netboot.xyz on a flash drive and it worked great… until that drive failed. I’ve always wanted to learn more about PXE Boot, as it seems every PC has it, but the network piece seemed daunting (turns out, it’s really easy!).
There are (at least) 2 ways of setting this up; the first one is using pfSense’s built-in TFTP Server to serve netboot.xyz’s bootloader. The second method, the one I chose, is to point pfSense at my locally hosted netboot.xyz instance. For this, I choose to run netboot.xyz as a Docker container using docker-compose (docs here). However, you could run this in TrueNAS SCALE, Synology, Kubernetes, etc…
NOTE: I would recommend setting up volume mounts for your data. I created directories
/opt/netbootxyz/data/config&/opt/netbootxyz/data/assetsand then added the following volume mounts to my docker-compose.yaml:
  volumes:
      - /opt/netbootxyz/data/config:/config
      - /opt/netbootxyz/data/assets:/assets
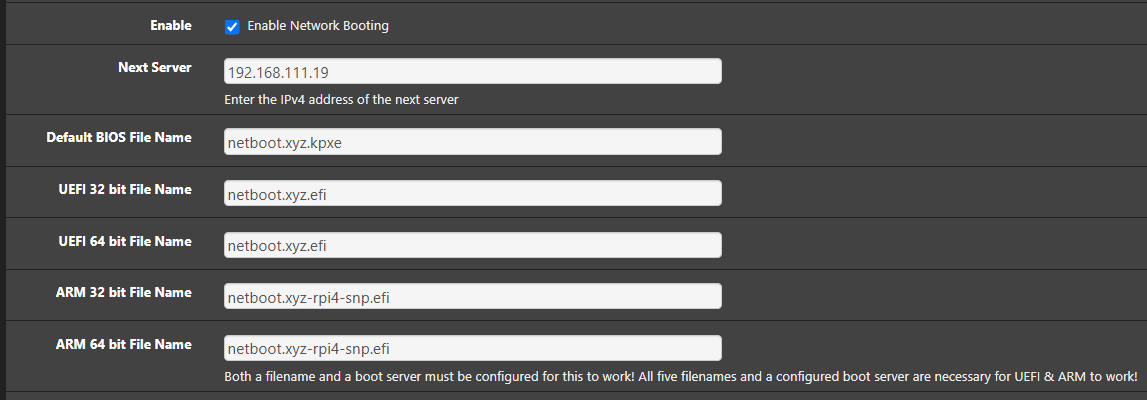
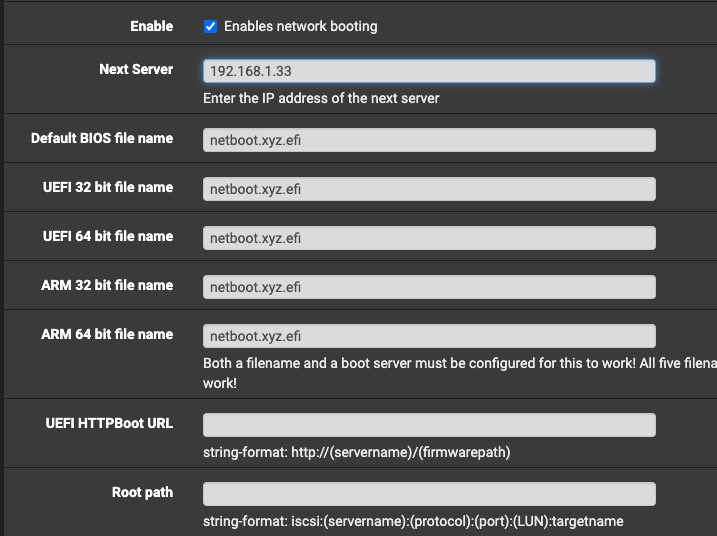
Once you have that up and running, you need to configure pfSense’s DHCP server to tell clients where your PXE host is. In the pfSense console, head over to Services → DHCP Server and choose your interface at the top (in my case, LAN). Scroll a ways down until you get to the Other Options section and click Display Advanced next to Network Booting. Check the Enables network booting box and set Next Server to your host IP that’s running your docker container. Finally, for all “* file name” fields (5 of them), input netboot.xyz.efi and then click save. For reference, my configuration looks like this:
Now, for any PC on your configured network, you should be able to press (typically) F12 to get to your boot screen and select Network/PXE. This will load up the netboot.xyx menu and allow you to pick any of their supported OSs out-of-the-box, or you can load your own. You can also go a step further and mirror the data locally!
NOTE: make sure client machines are set to boot (in BIOS) into UEFI mode (CSM disabled). If not, you could run into an OOM error upon boot.
P.S.: Tom, if you’re reading this, I think this could be a really cool video. Perhaps demystify PXE, iPXE, HTTPBoot, TFTP, and this option vs. pfSense’s built-in TFTPd.